First time shooting Kosmo Foto Mono in the Mamiya 645 …

I have a few rolls of Kosmo film in my fridge and until recently I have not got around to trying it out for one reason or another.

So a few weeks back I was going through my film stash looking for something to try and get my shooting mojo back and came across a roll of Kosmo Foto Mono in 120 and as it was a pretty bright day I thought it was about time that I tried it out.

I loaded my Mamiya 645 for a change as it gives me 15 frames to play with and popped out for a nice walk.

When I goto back I looked up a few different developing options and went for Rodinal 1+25 dilution for 3 and a half minutes.

Once developed and even before the film was dry I could see that the negatives looked crisp and sharp and with good contrast.

When I scanned the first frame I was very pleased with how it looked, the tones and contrast were really nice and the sharpness was excellent.

Even though I used Rodinal the grain was very subtle and didn’t stand out unlike most of the time I use it.

Overall I really like how this film stock looks especially in medium format, I have a couple of rolls in 35mm to try next and will use the same development just to see how it compares.

So here is the whole roll warts and all …

Comments most welcomed, click on an image to view larger

All images on my blog are available as prints just drop me an email

I also have a film only blog over at  usingfilm.wordpress.com if you want a peek

Also still have a handful of zines over on my etsy store as well as some hand made film canister keychains … https://www.etsy.com/uk/shop/timdobbsphoto

Trying Silberra Orta 50 ….

As I have said before I am trying to spice up my photography this year by trying different things so I decided to try out a roll of film that has been in my fridge for ages … Silberra Orta 50.

I have had this roll for over 2 years and have tried ilford’s Ortho offering before digging this out.

I really liked how Ortho 80 looked when I tried it so I was looking forward to seeing how Orta 50 compared as they are both Orthochromatic films.

You can see my previous blogs of Ortho 80 here:

It was a reasonably bright day so I loaded my Nikon F90 which I have been neglecting recently and went out for a walk.

When I returned home and opened the Massive Dev app to decide how to develop the roll I realised that the only developer that I had that was suitable was Rodinal which as it happens was the developer I used when shooting Ortho 80 last time.

The dilution/times were 1+25 for 11 minutes

The resulting negatives were extremely contrasty looking out of the tank and just the same when scanning.

I am not sure if it is the developer or the film stock itself but most of the images had a sort of a glow about them and quite a few of the highlights had blown out.

The overall look was pleasing and I liked the contrast and sharpness but compared to ilford Ortho 80 the tonal range was far more compressed.

If I had to choose which stock I would shoot again it would have to be Ortho 80 to be honest as Orta 50 was a bit too harsh for me and the grain was a little too intrusive but that may have been the fault of using Rodinal.

So here is most of the roll minus some duplicate frames.

Please click a photo to view larger

All images on my blog are available as prints just drop me an email

I also have a film only blog over at  usingfilm.wordpress.com if you want a peek 🙂

ilford Ortho Plus pushed to 400 by accident but I think it worked … the whole roll

I have shot ilford Ortho plus in 120 format before and really loved how it looks.

Sharp as a tack and very little grain with great dynamic range.

This roll that I shot in my Mamiya RB67 over Christmas was a total accident.

I received a few rolls of film from my better half as a present as usual namely a few different Lomography films in 35mm and 120 format one of which I have never shot before … Lady Grey 400

My plan was to take out the RB67 and for some reason I thought the Lady Grey was in 120 format so when I went to get it out of the fridge I realised it was 35mm so a little disappointed and not wanting to take out an SLR I grabbed the roll next to it which was the Ortho.

Problem was it was in my mind I was going to shoot 400 iso film so I set my meter to 400 before getting the film so obviously when I swapped to the Ortho I forgot to change the light meter and went out on our little walk happily shooting away thinking I had 400 loaded.

When I got home and unloaded the roll I immediately realised my mistake and promptly jumped on the interwebs looking for any info I could find about developing times for Ortho plus when pushed to 400.

I could not seem to find out much as obviously there was no one as dull as me and made this error so after a few twitter chats I decided to process in Rodinal 1+100 dilution Stand development for 1 1/2 hours with 2 inversions( I rotated with stick actually) at start then every 30 minutes and crossed my fingers that something was salvageable.

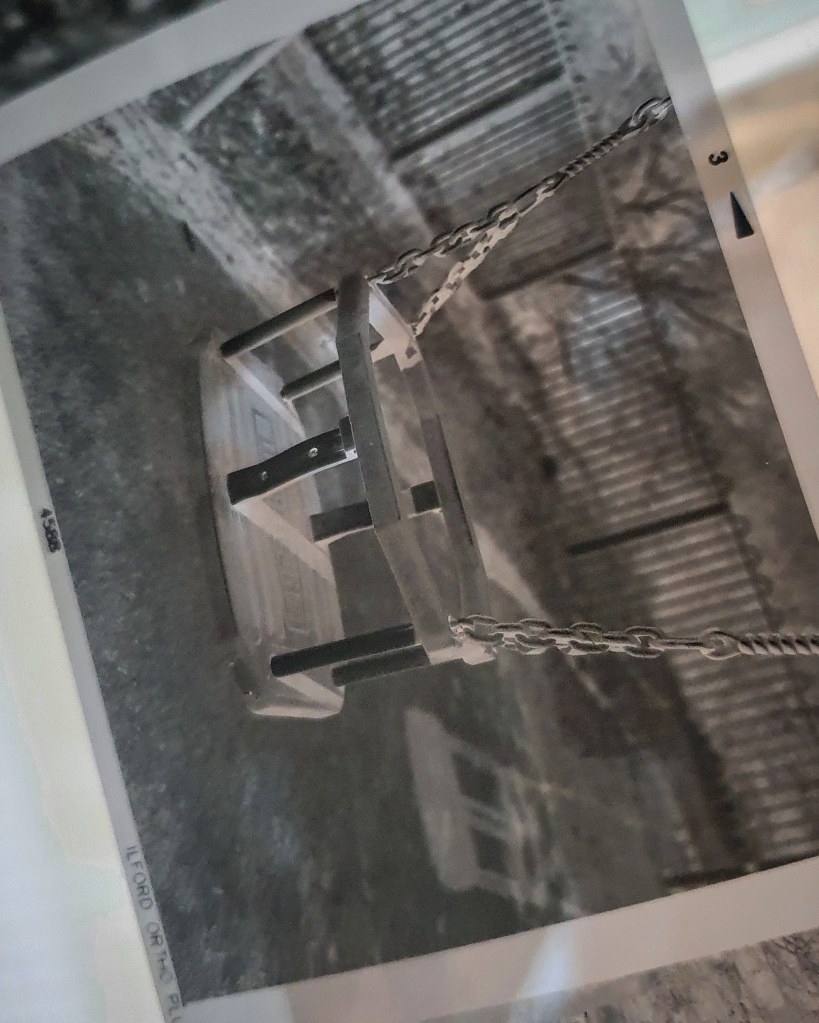
To my surprise then I opened the tank the negatives looked perfect so I hung them ups and waited to dry.

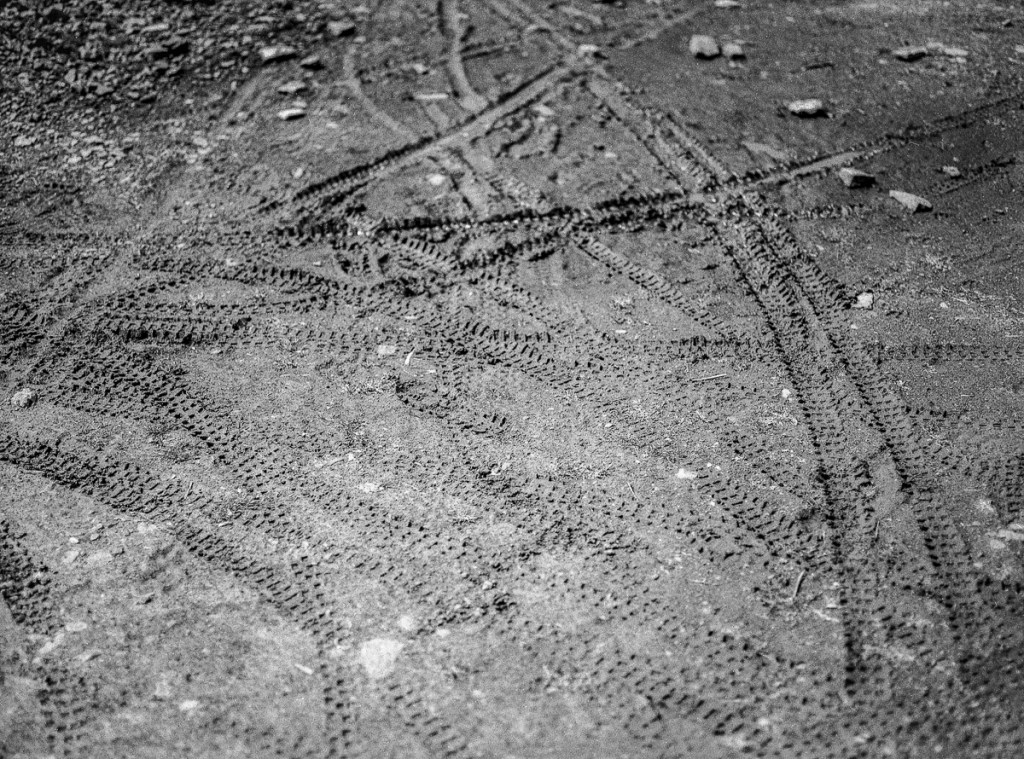
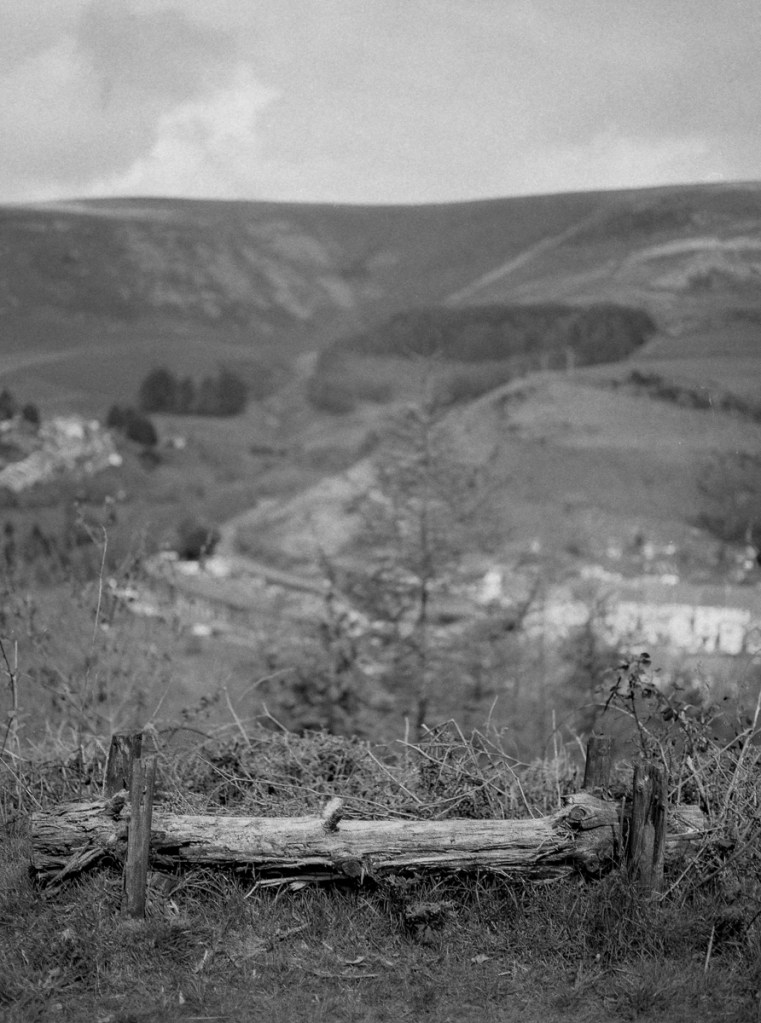
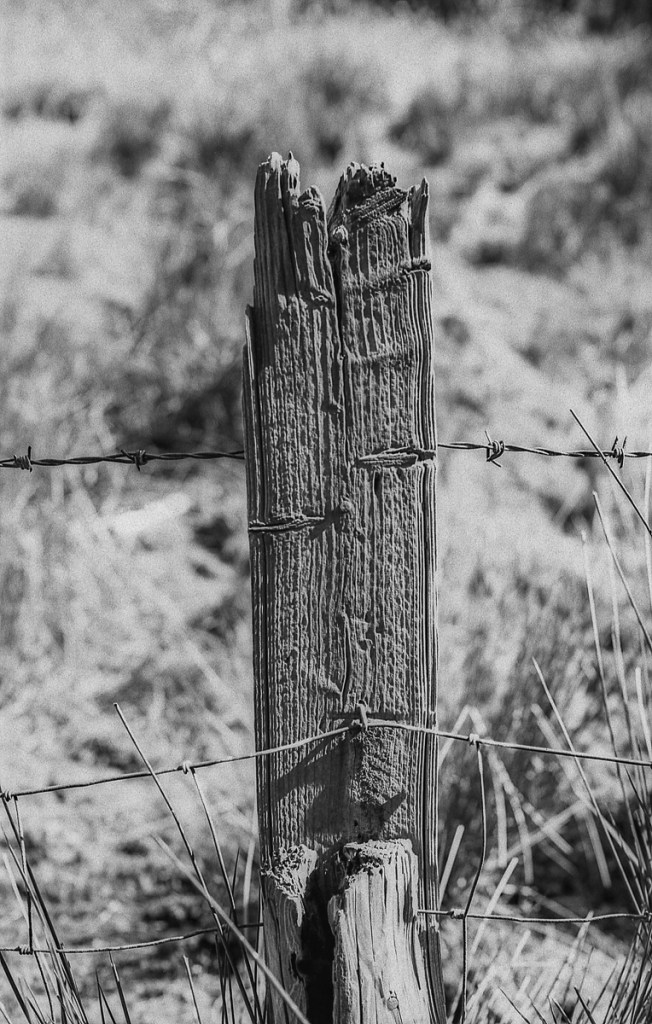
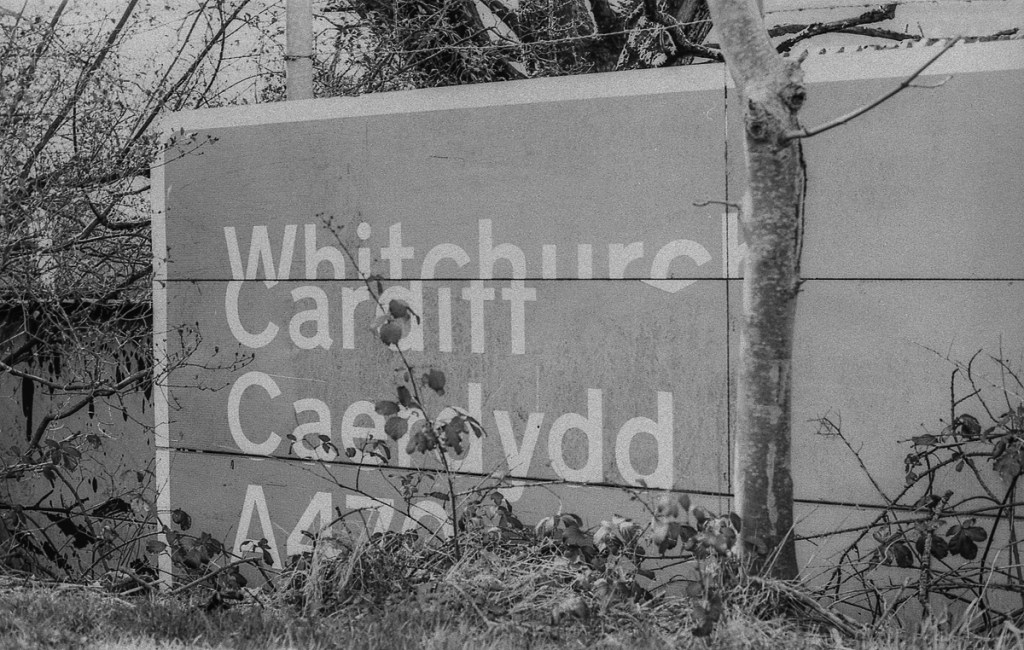
After scanning the only slight problem that I noticed was some of the highlights had blown just a little bit which must have been down to the stand development most probably (this was my 1st time trying this method).

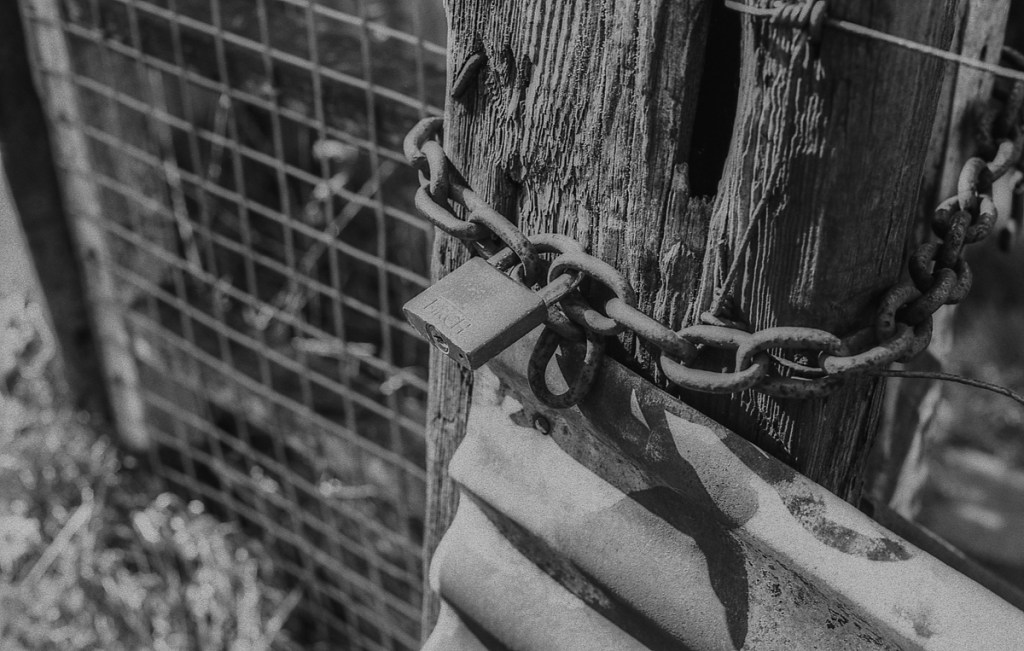
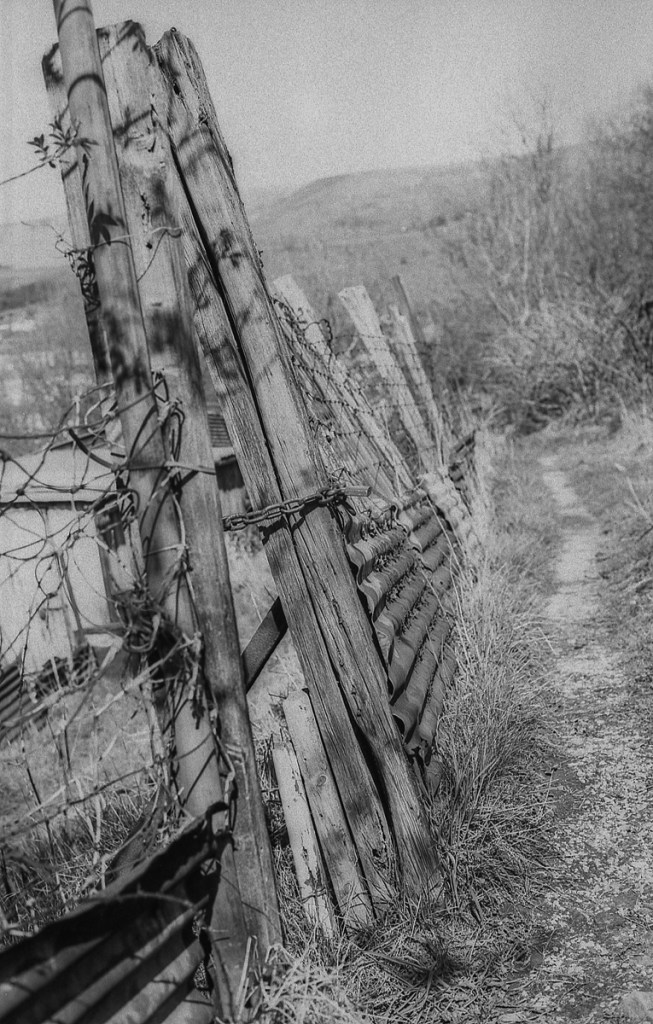
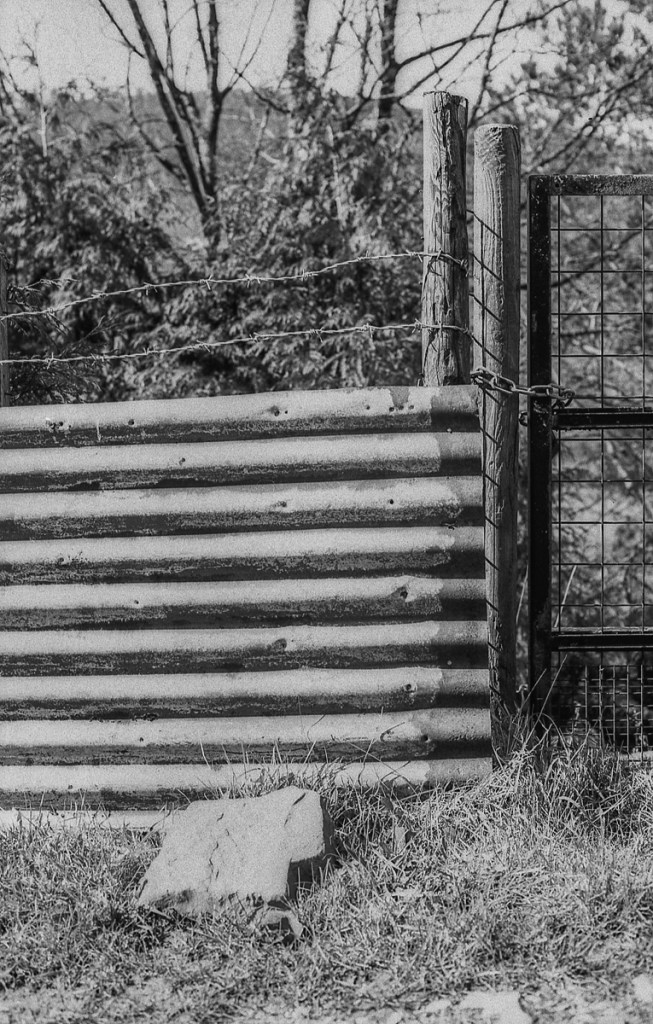
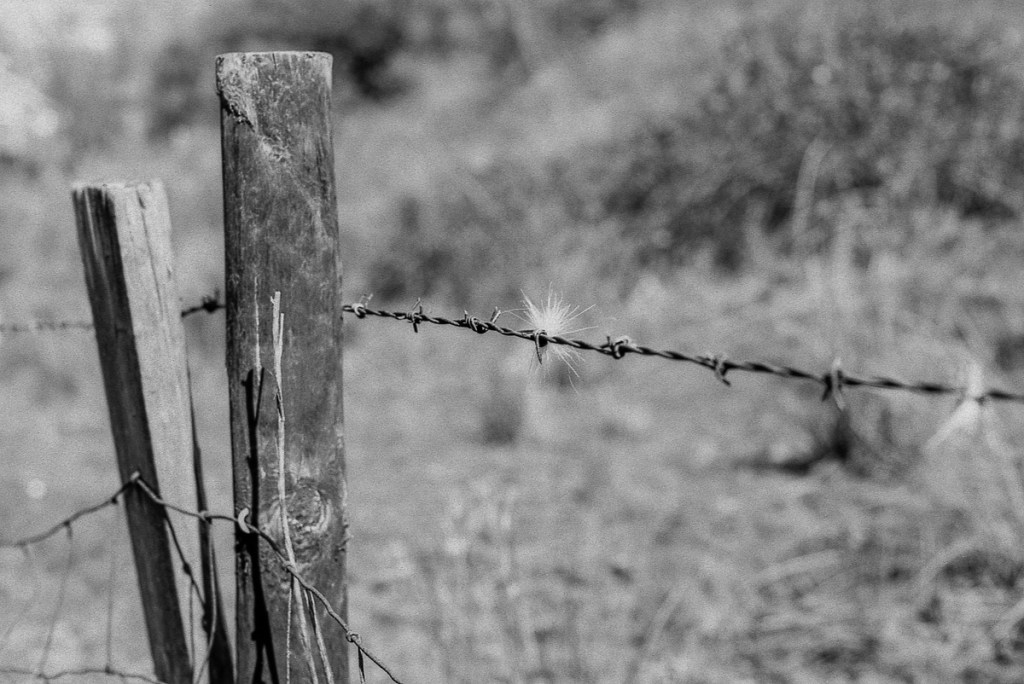
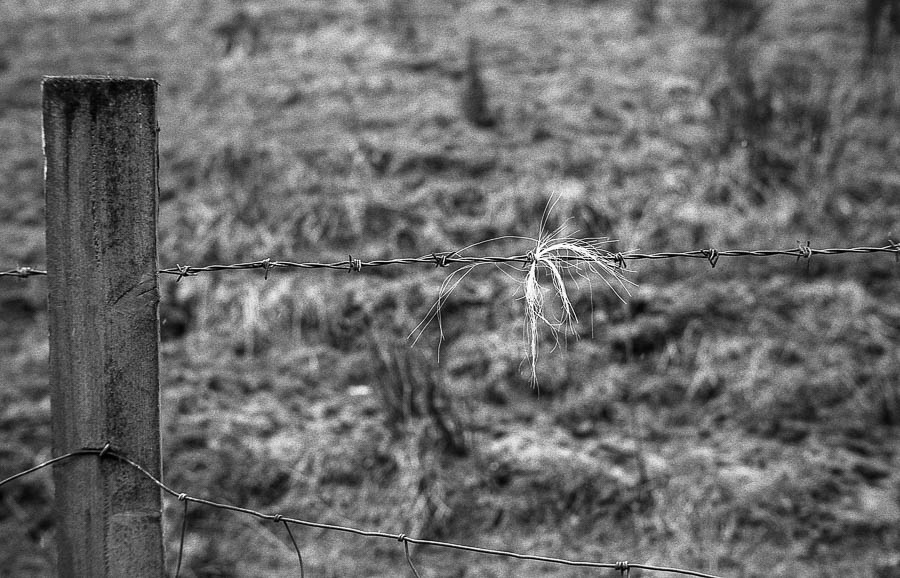
The highlights blowing didn’t really bother me and the sharpness and reasonable grain surprised me.

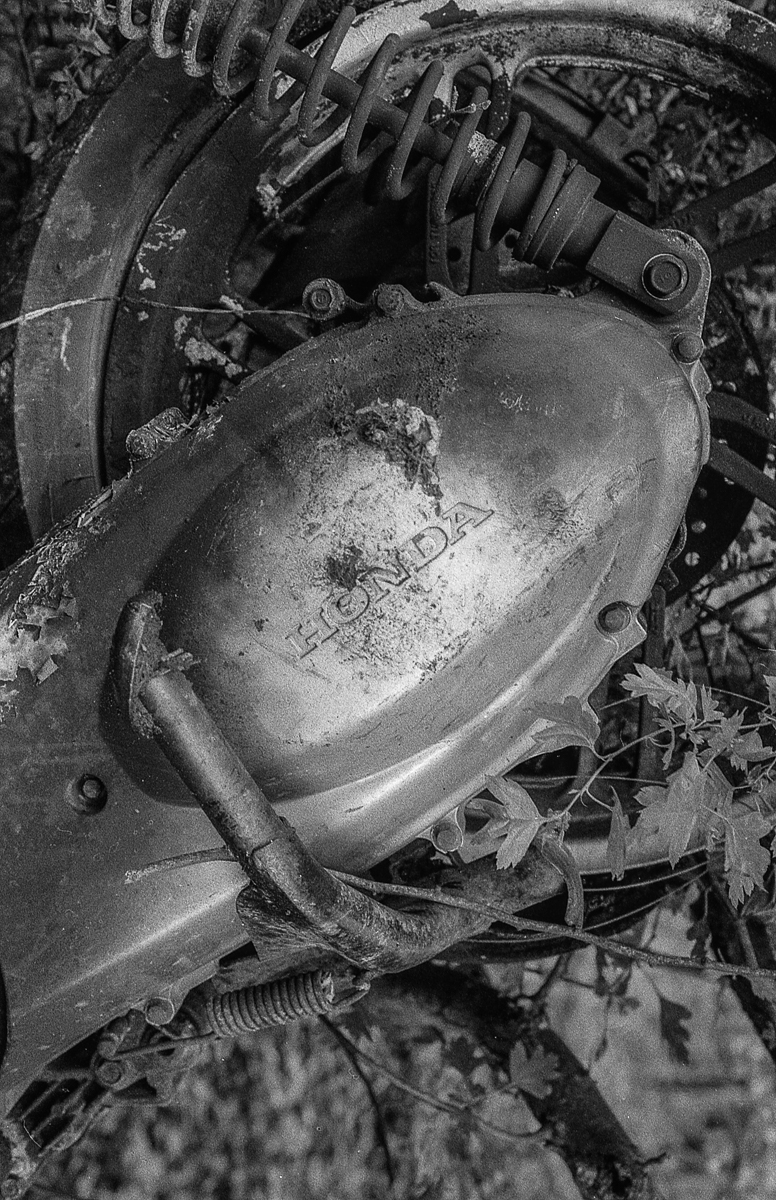
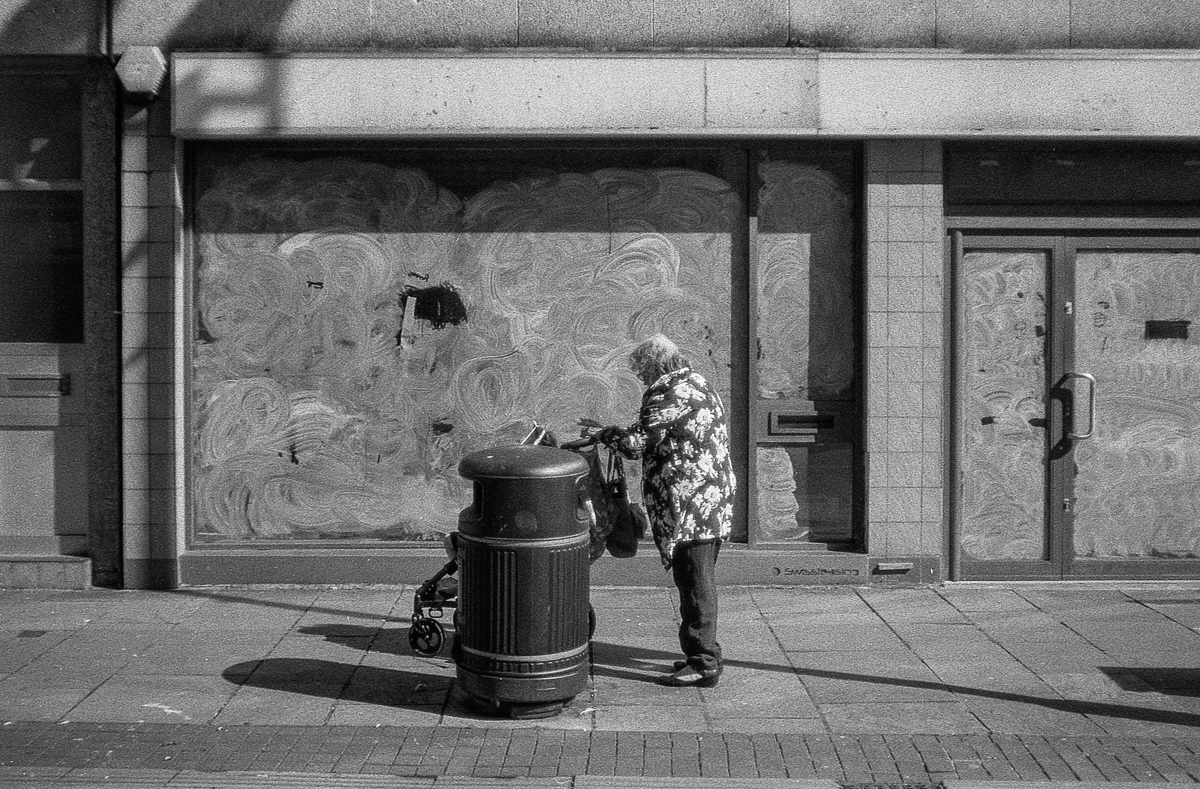
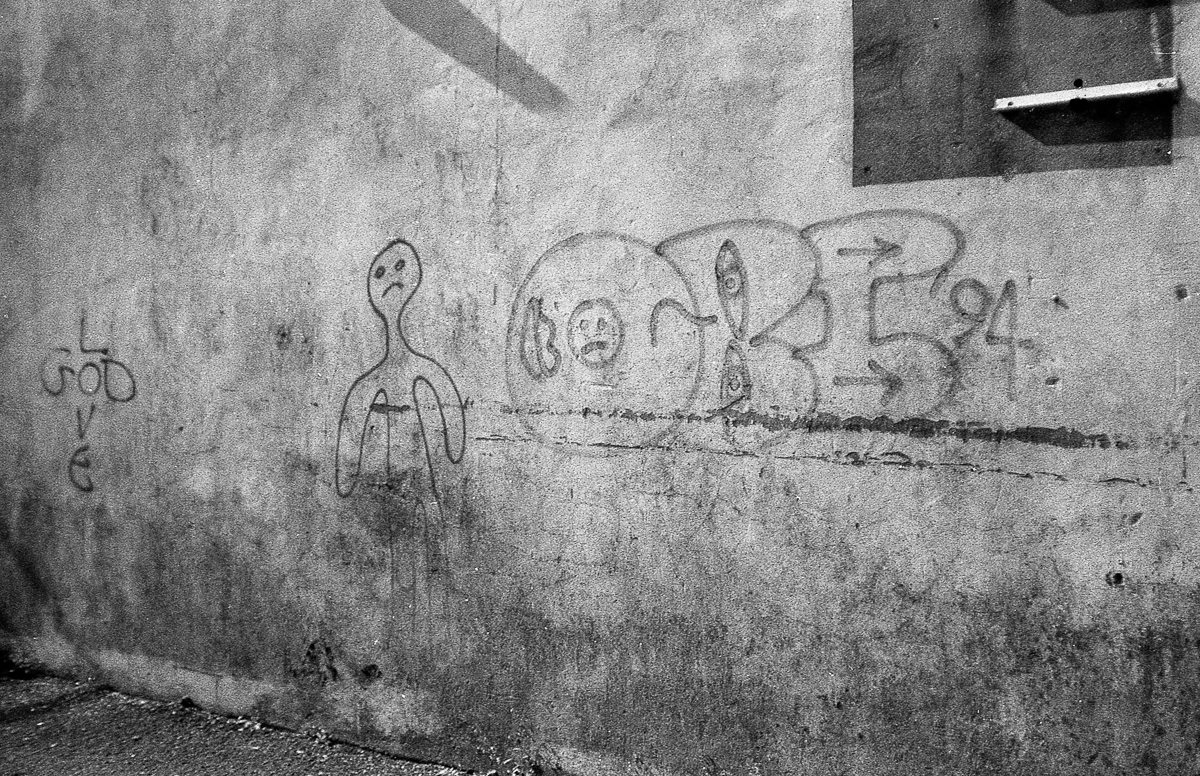
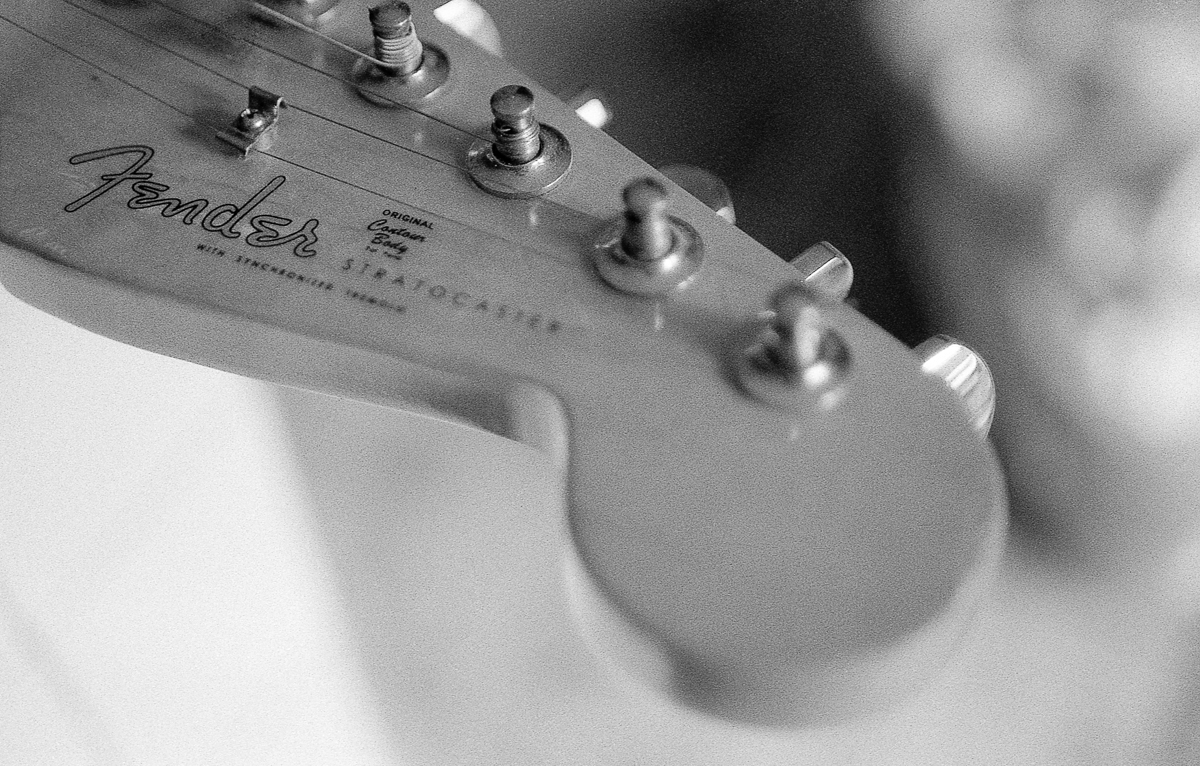
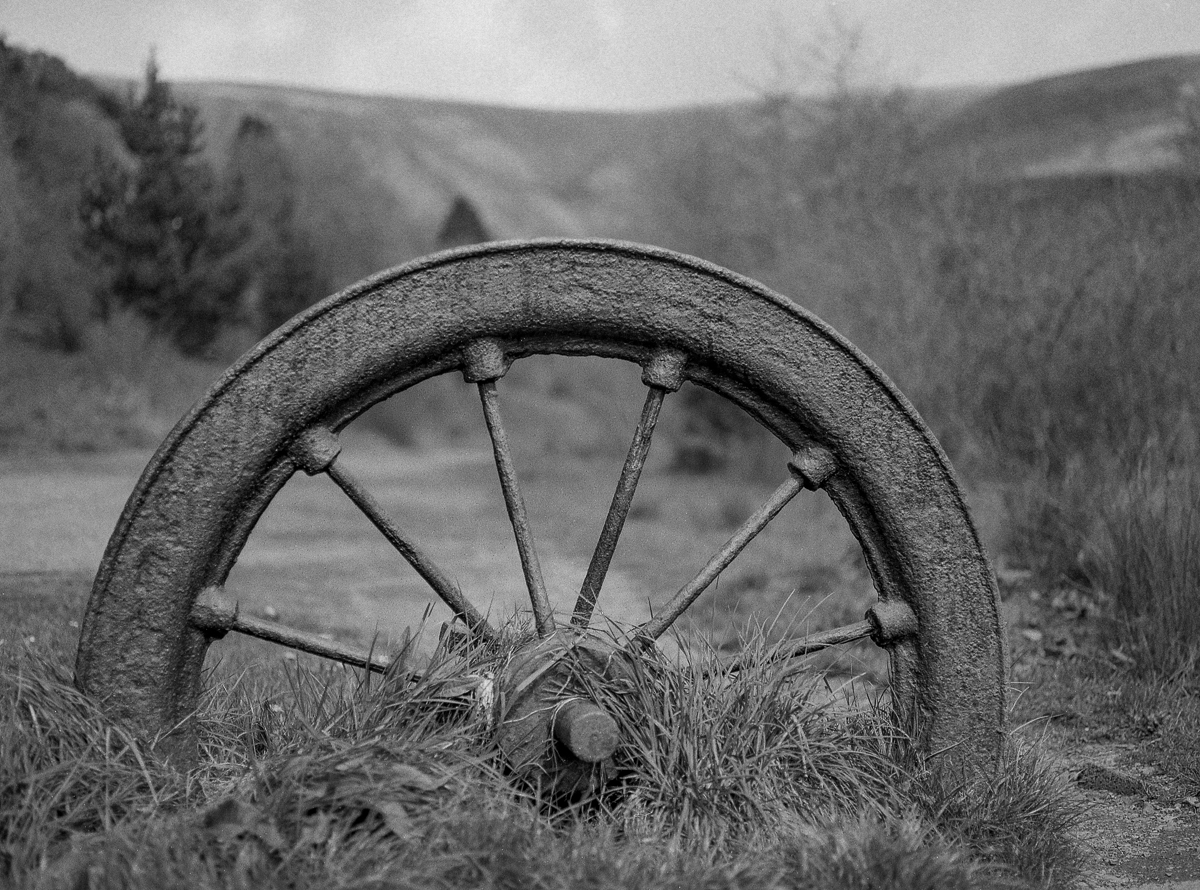
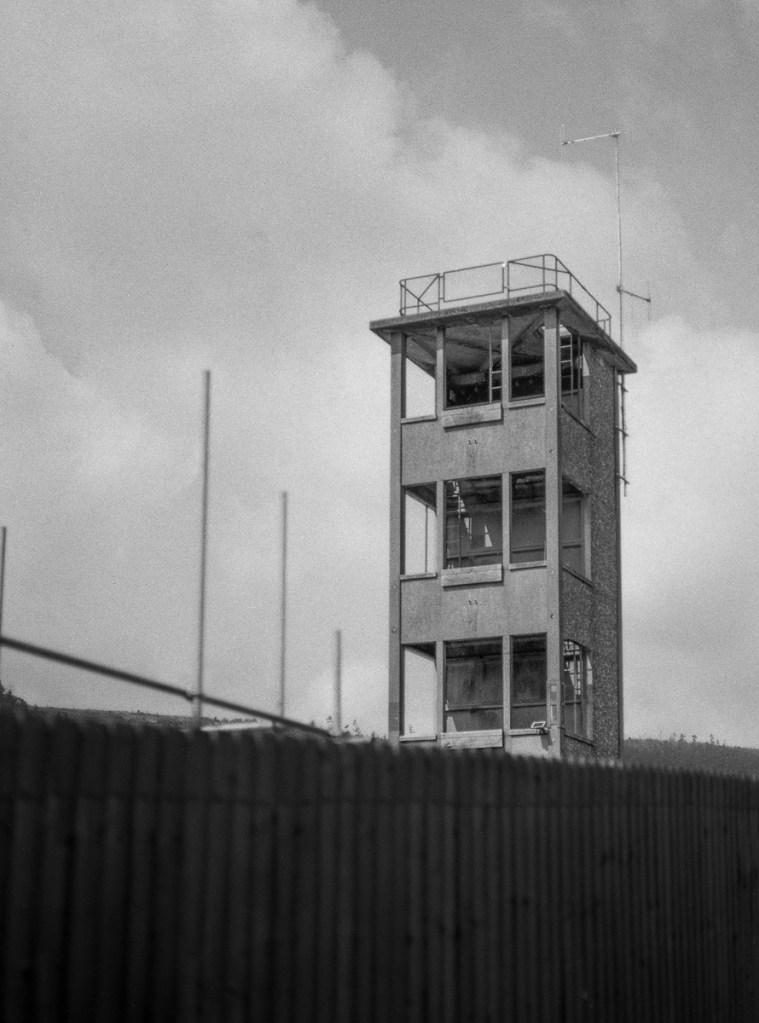
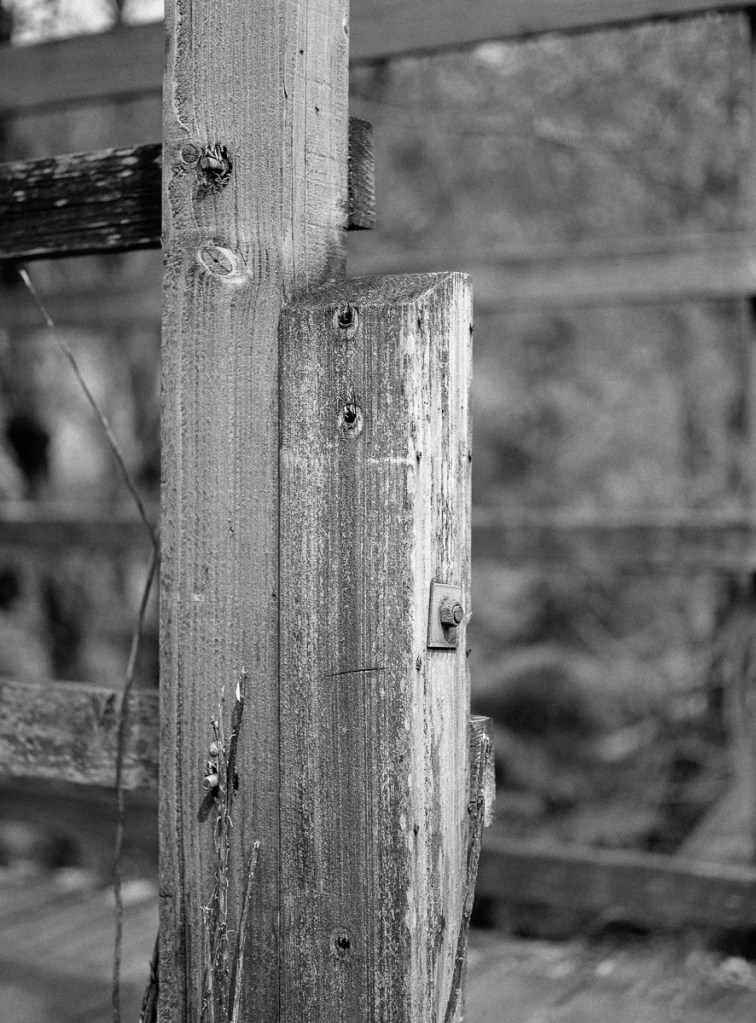
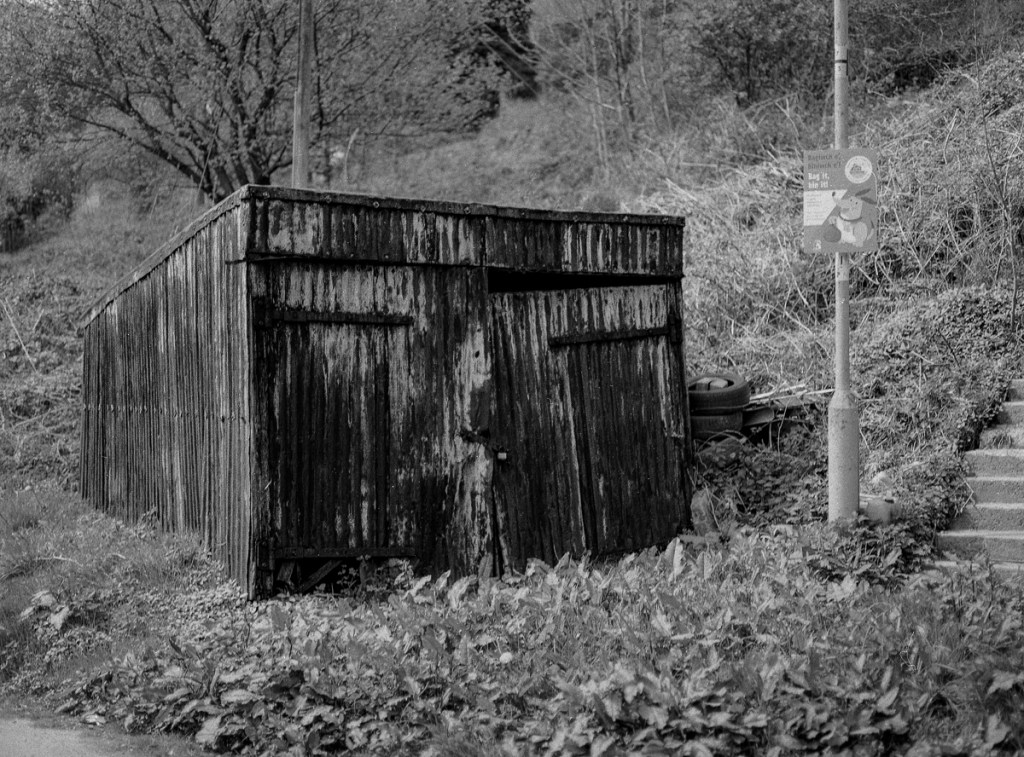
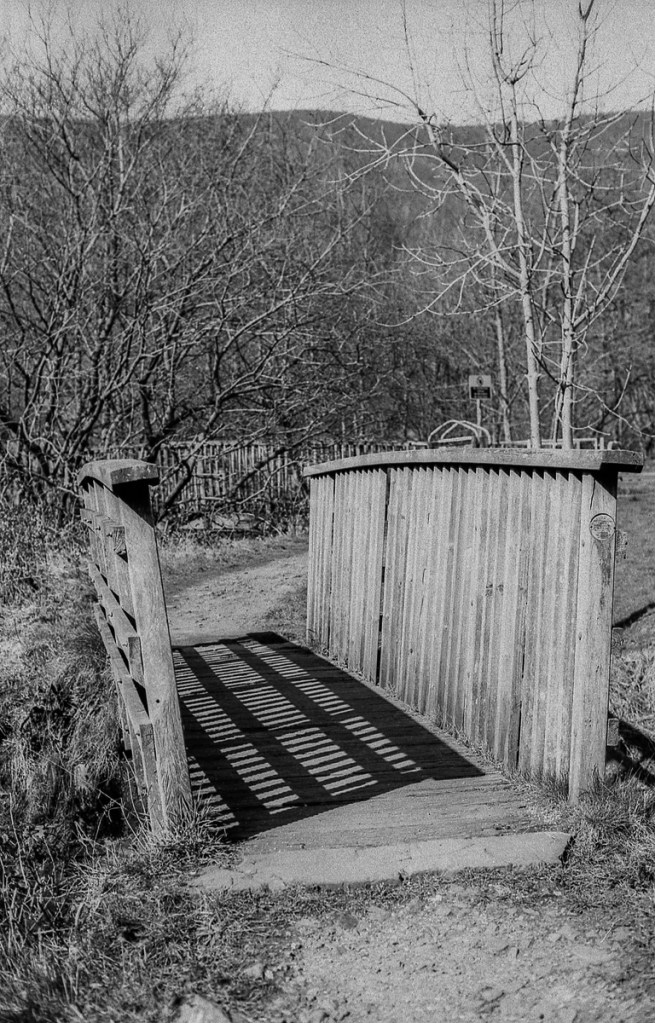
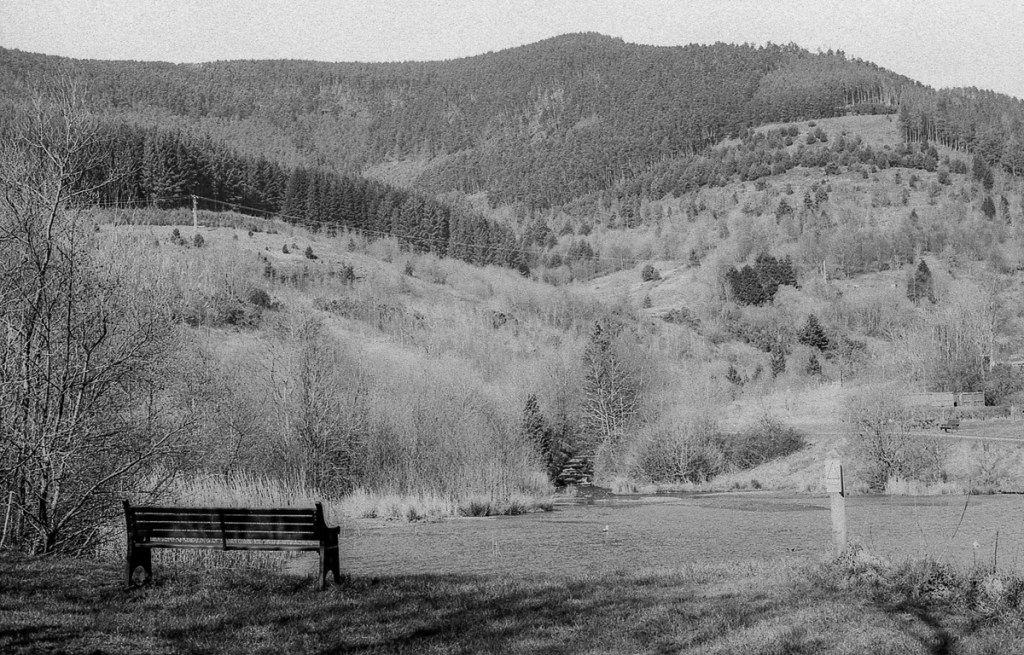
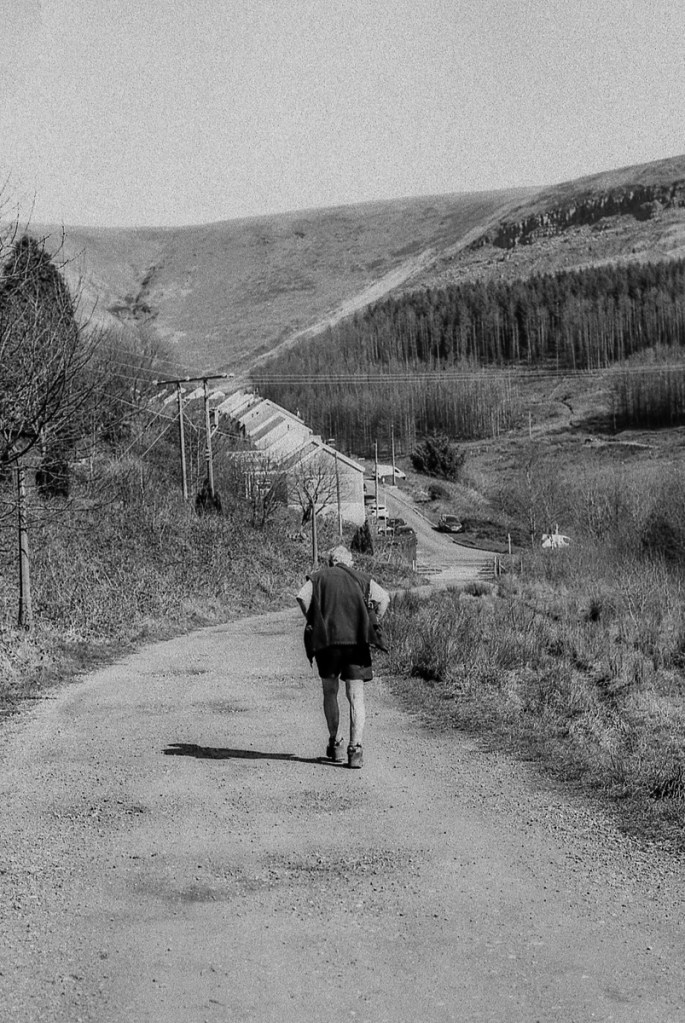
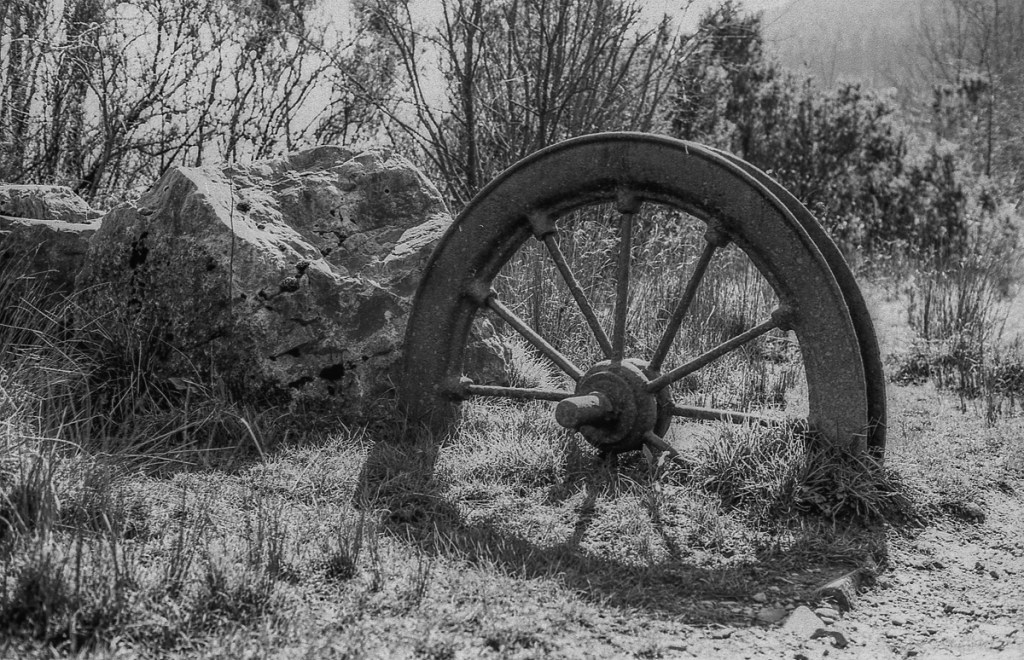
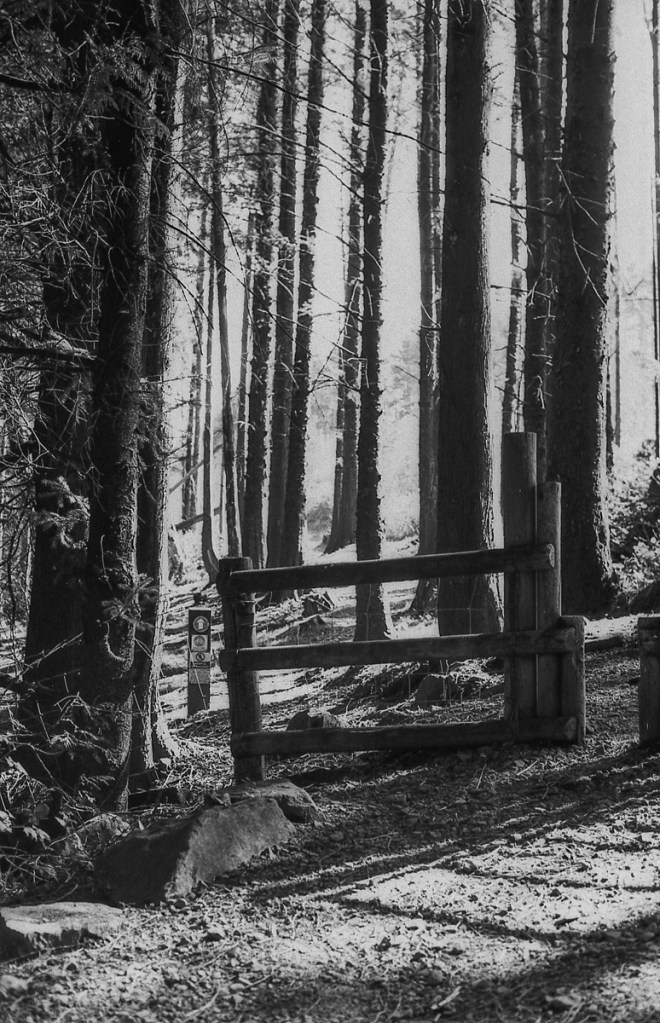
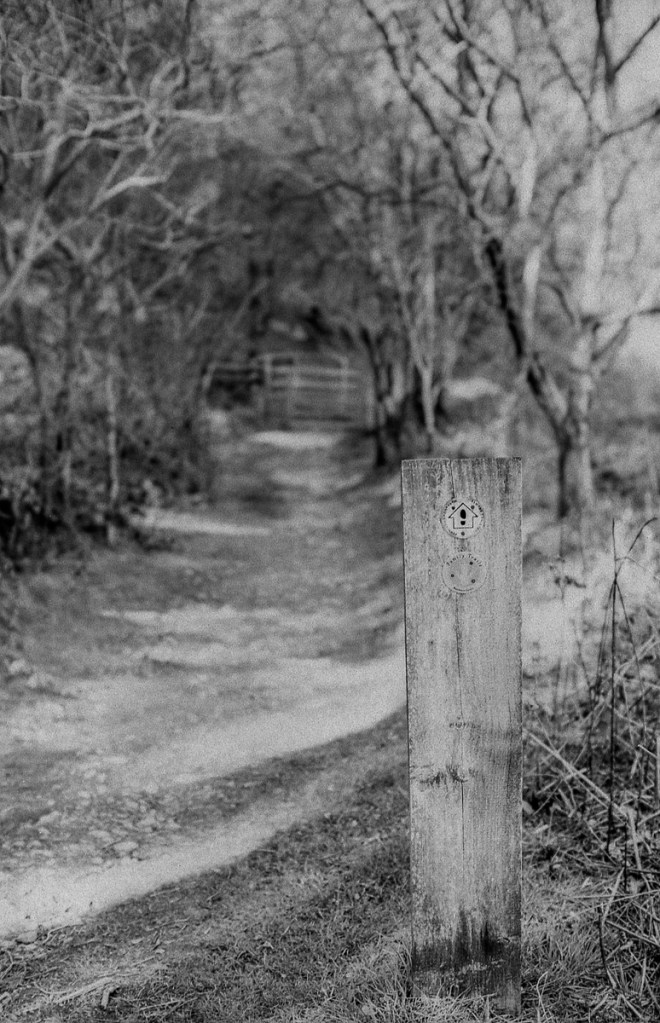
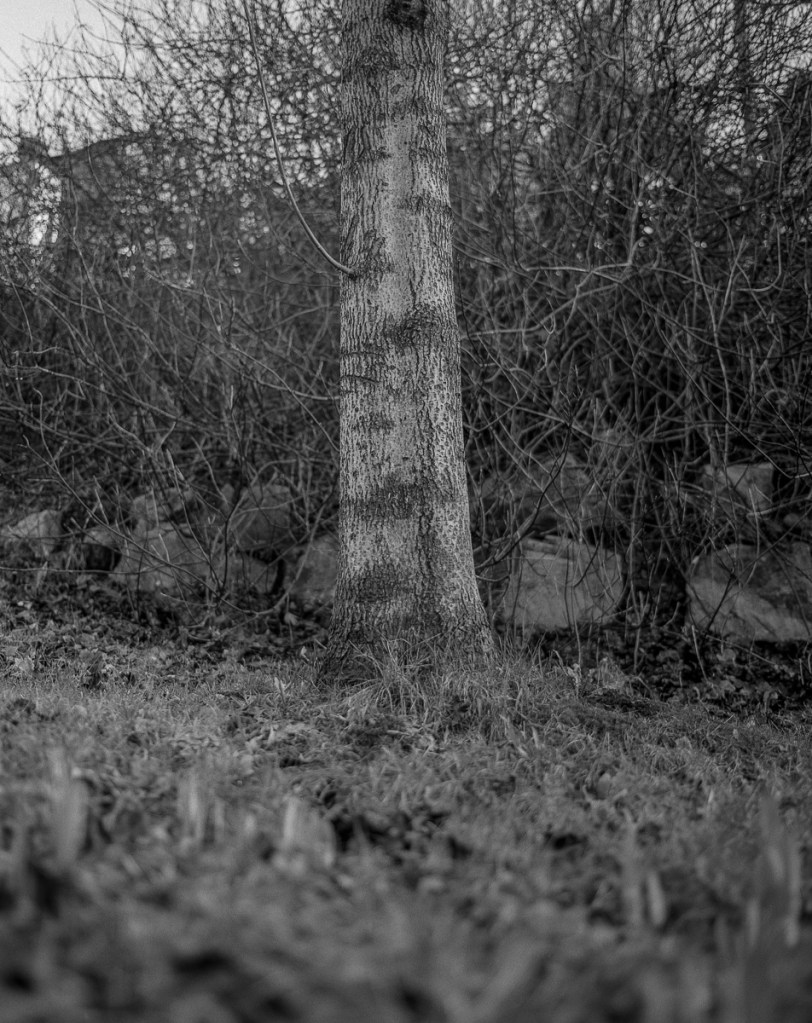
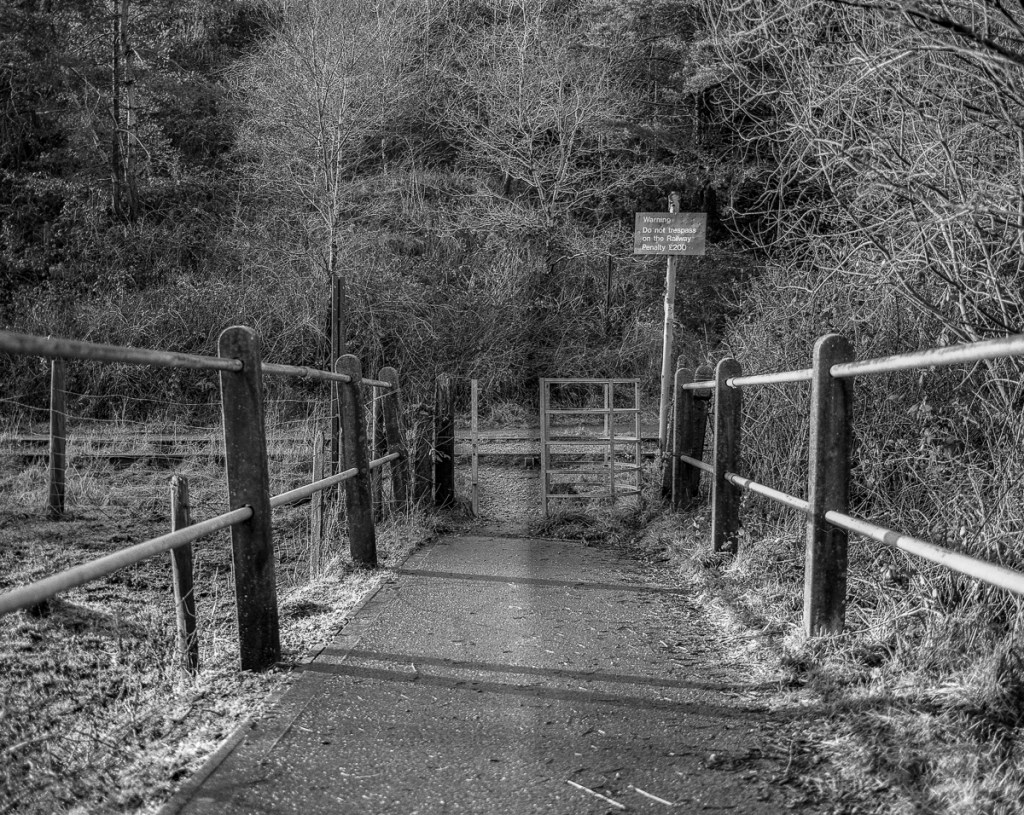
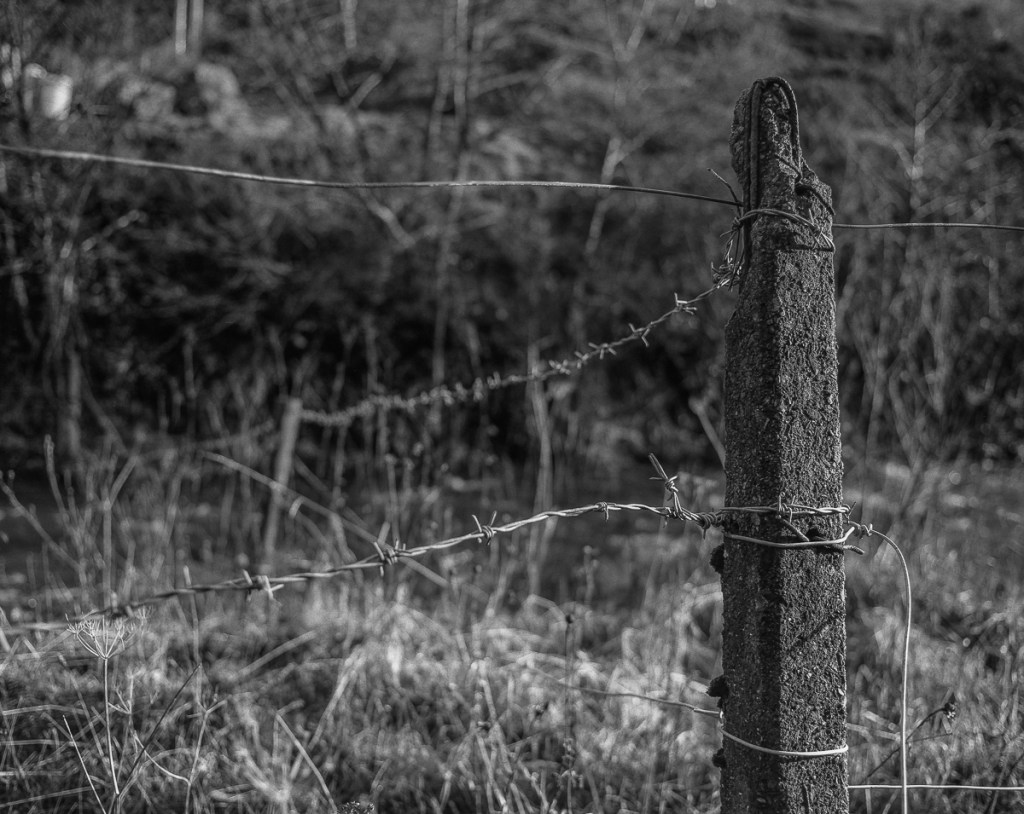
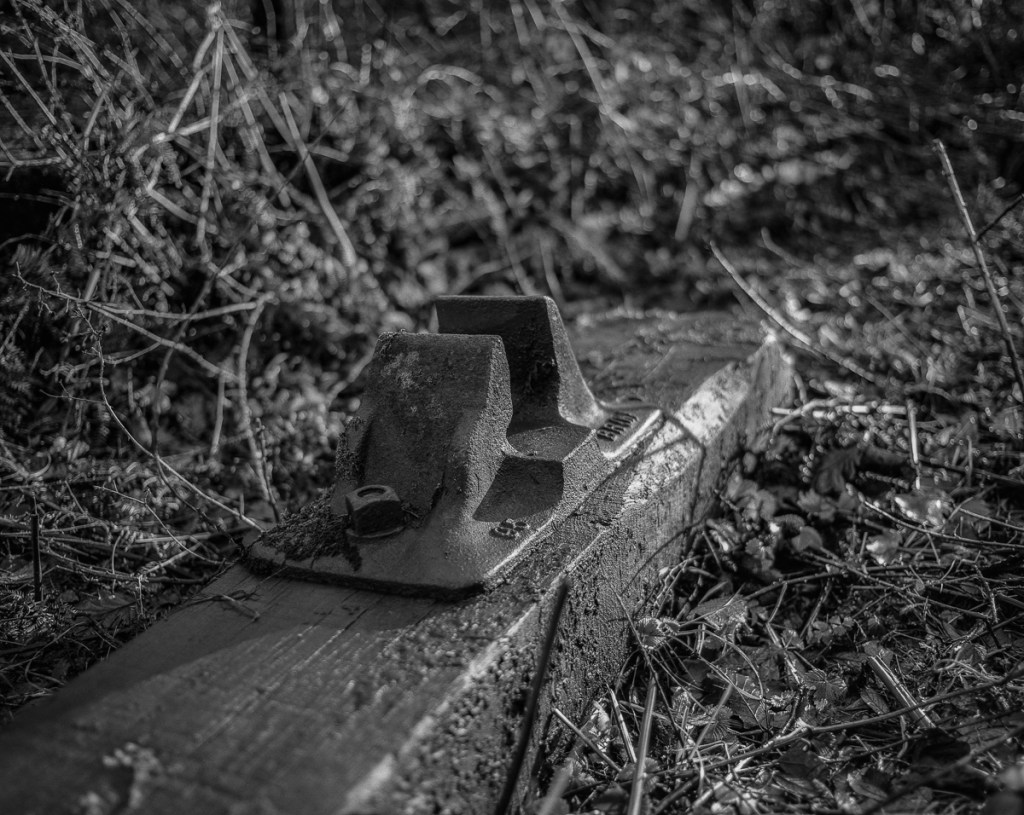
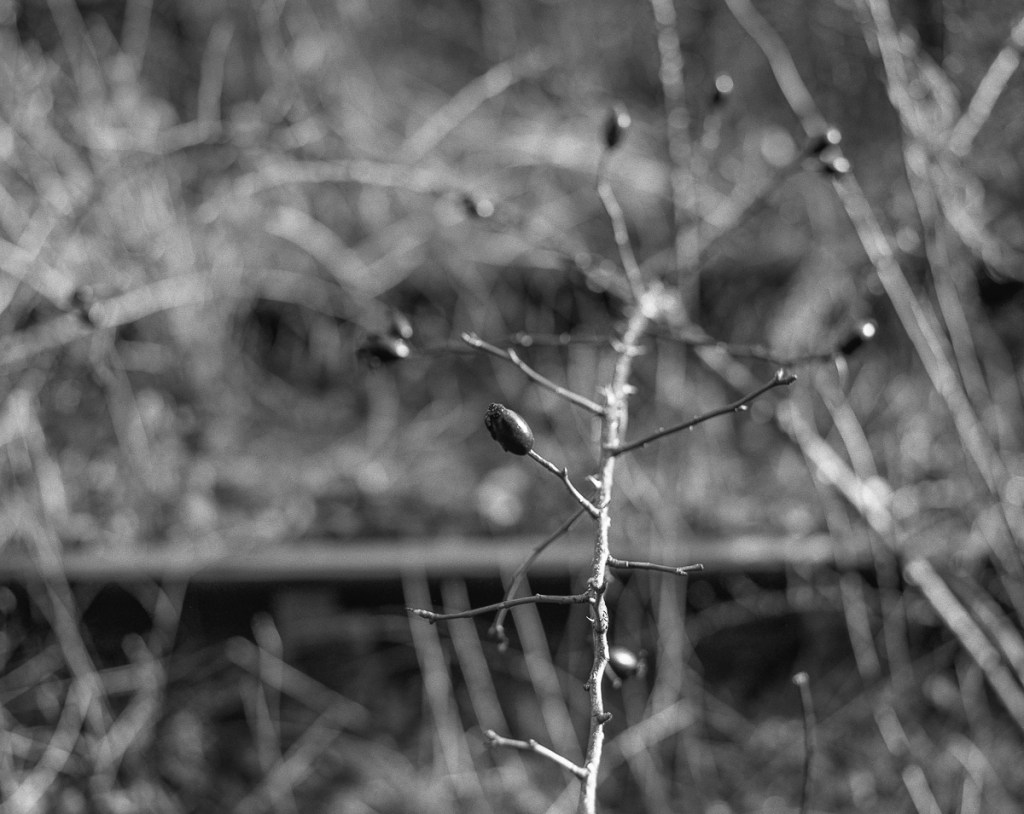
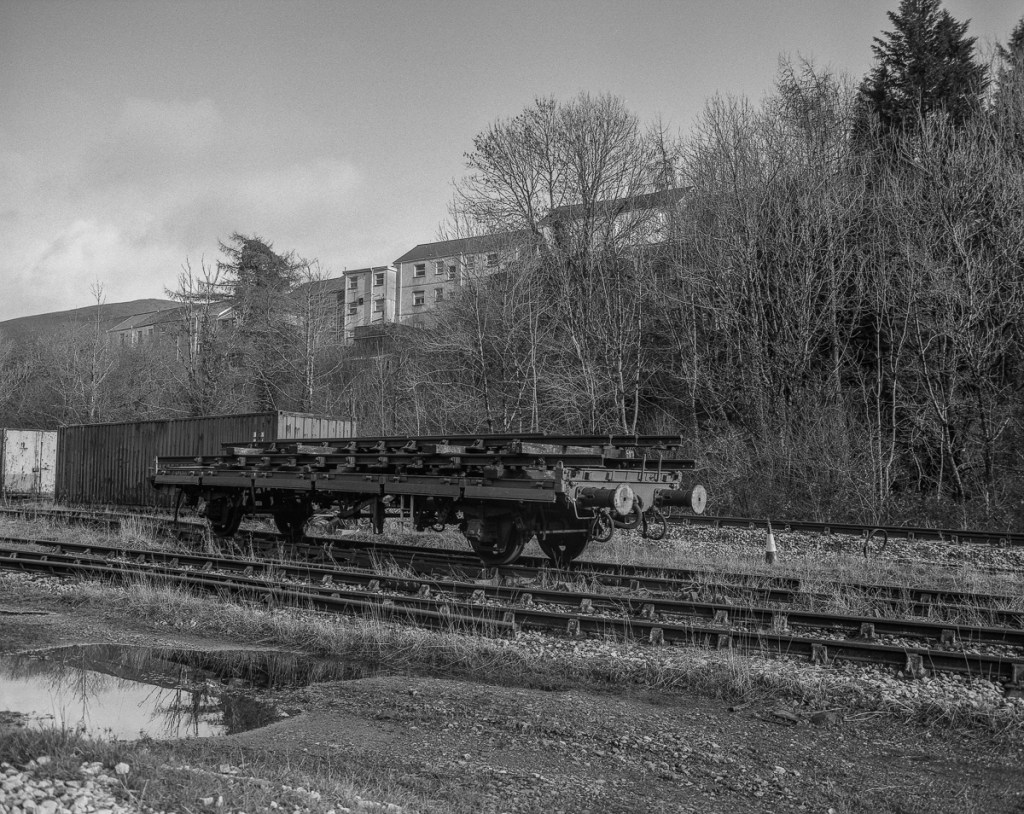
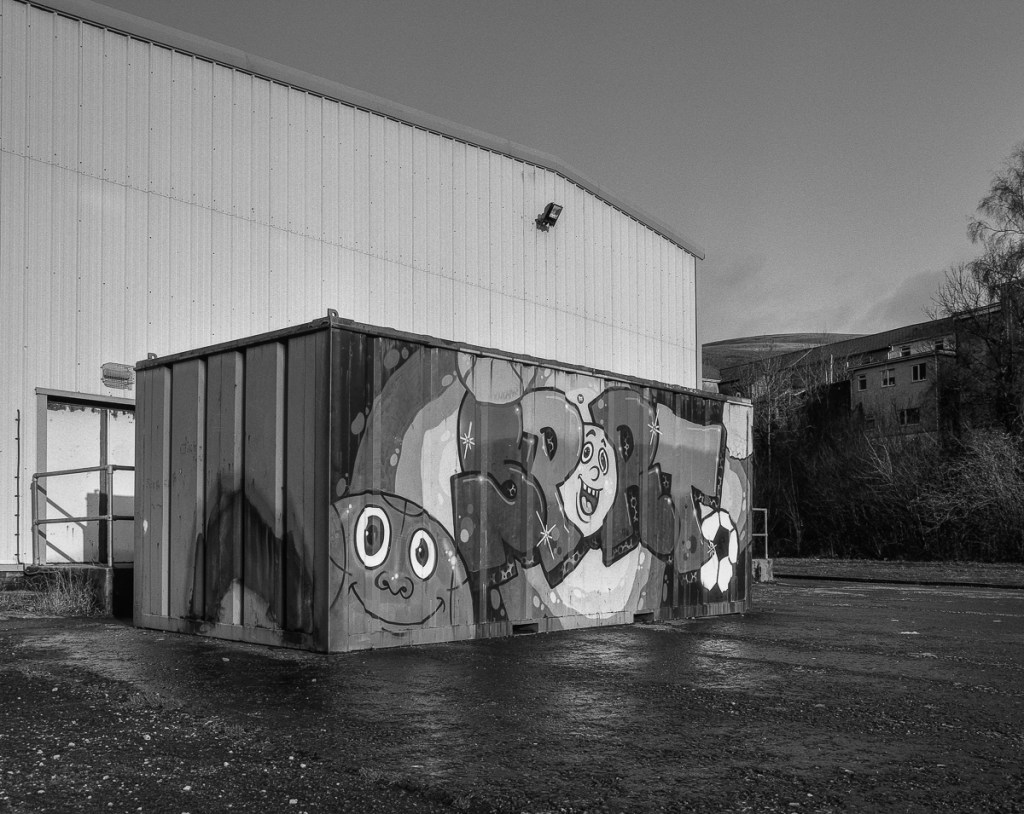
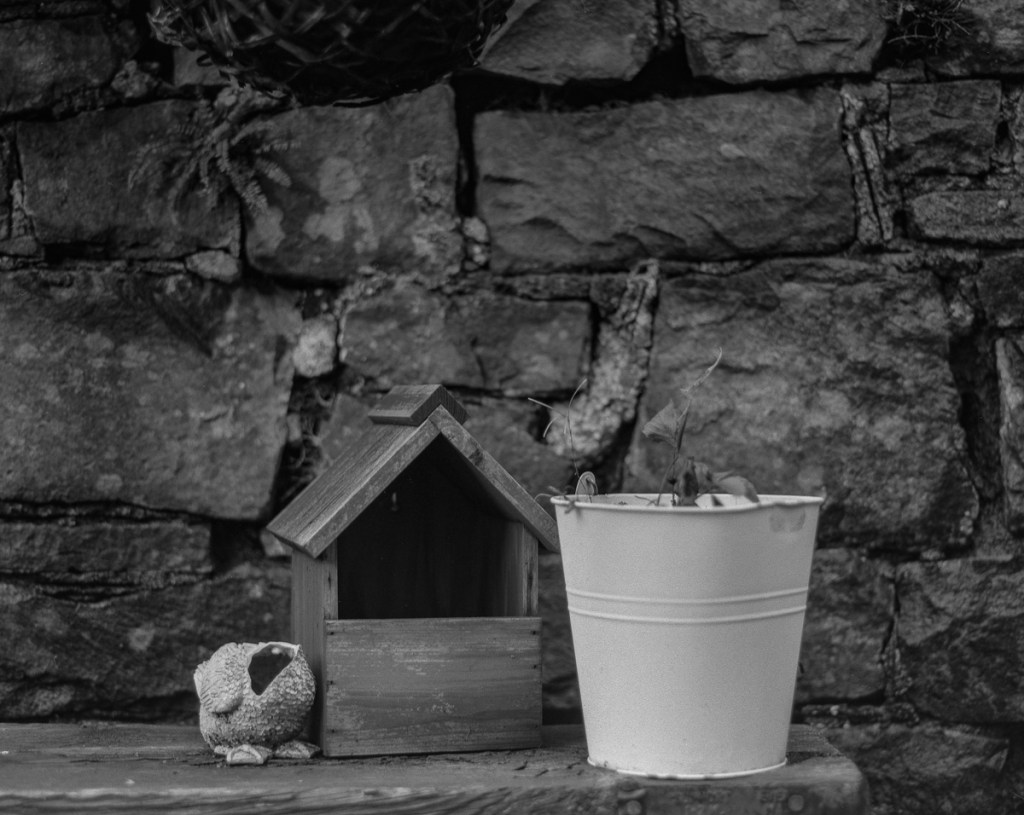
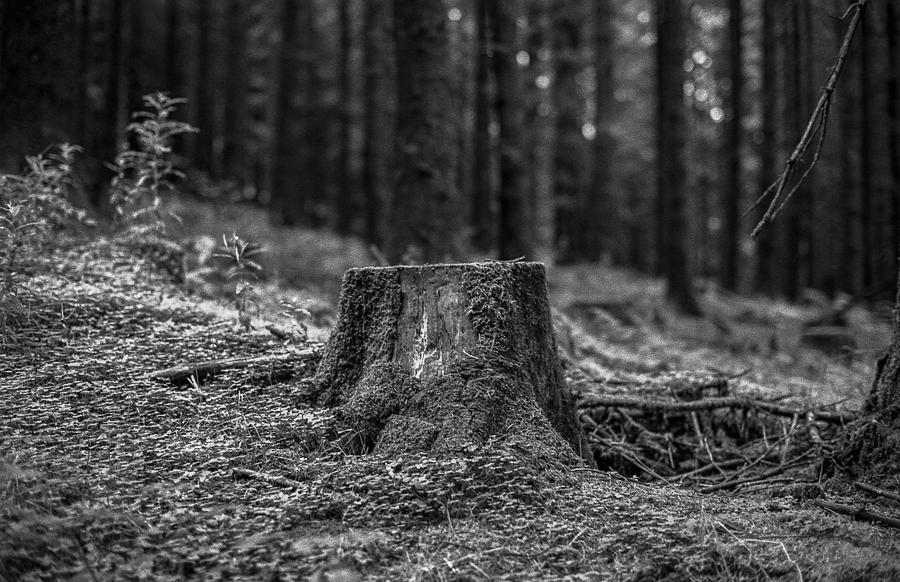
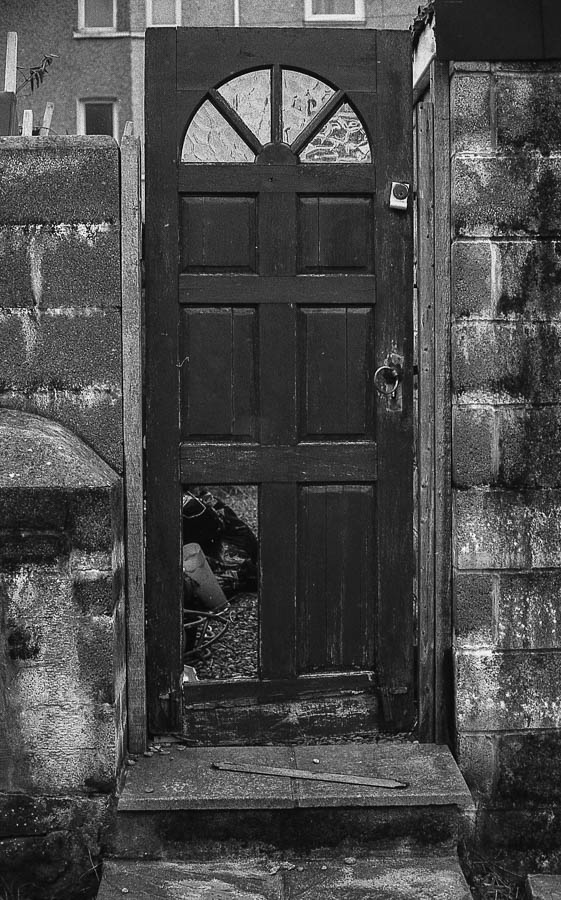
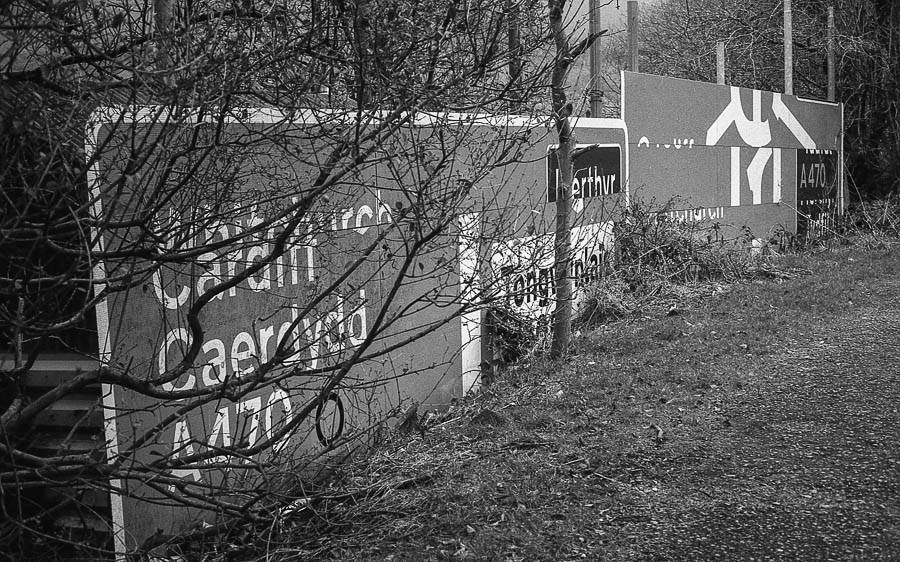
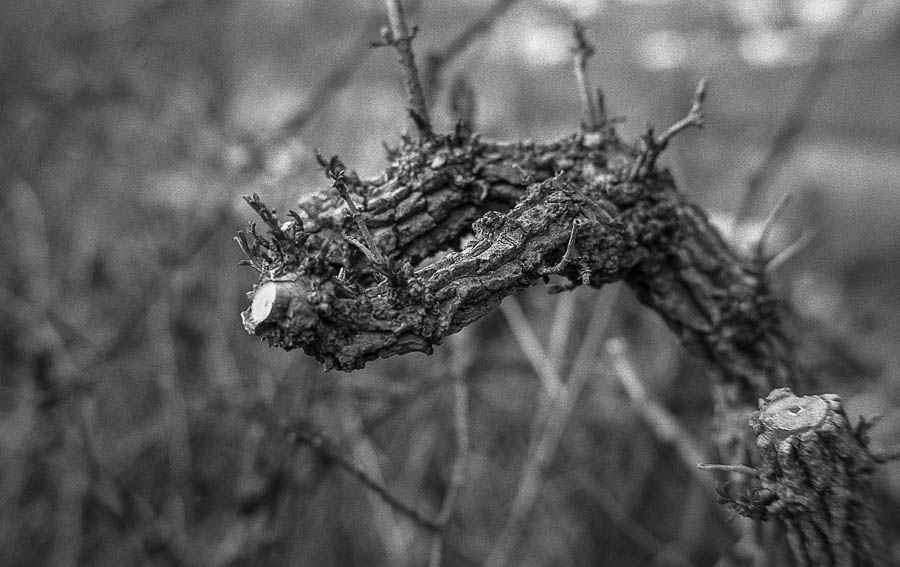
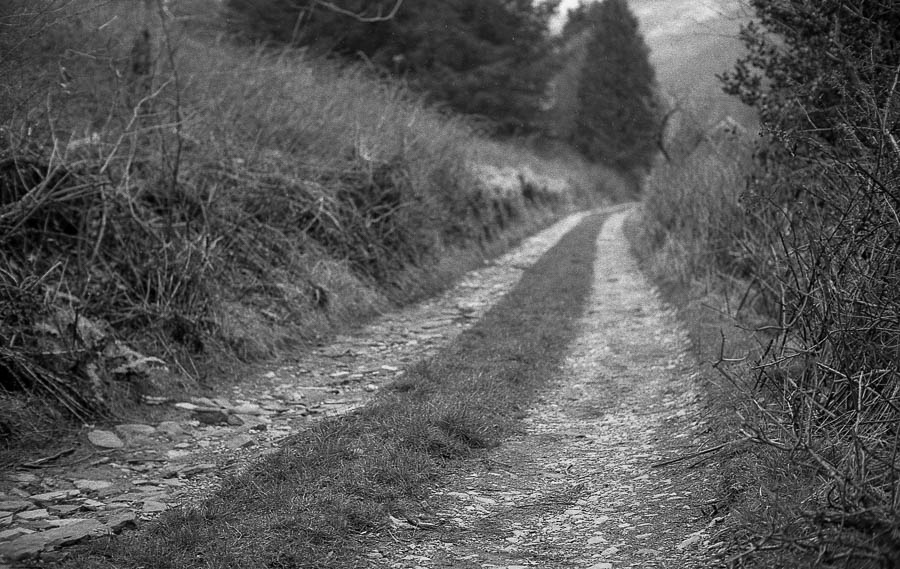
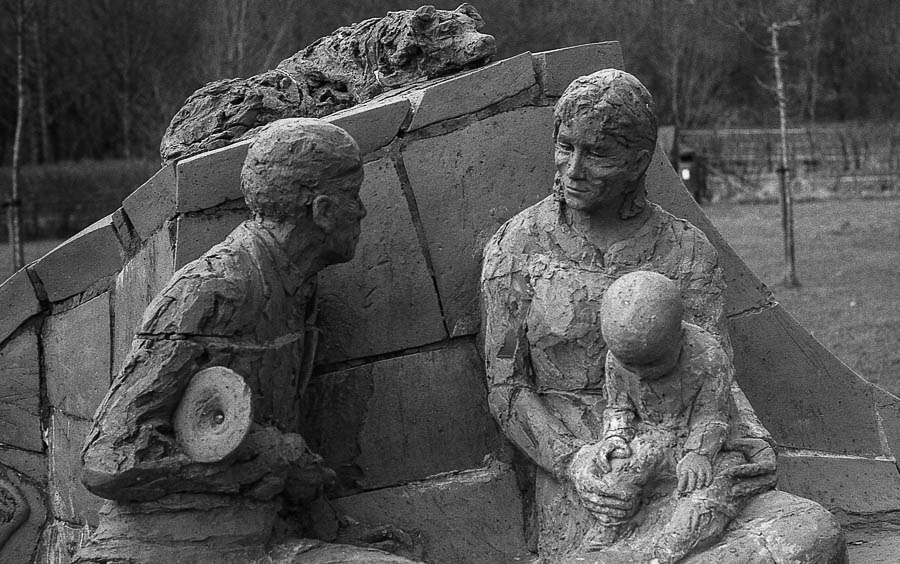
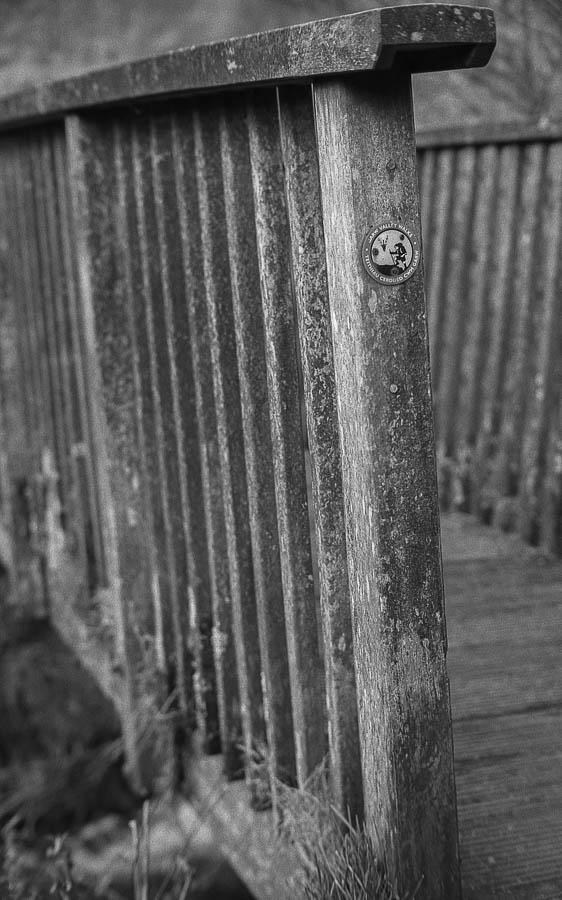
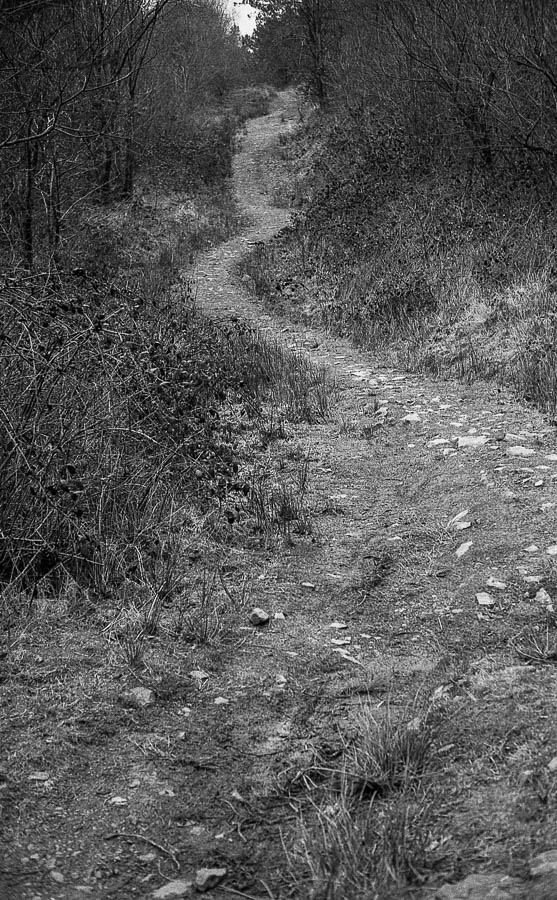
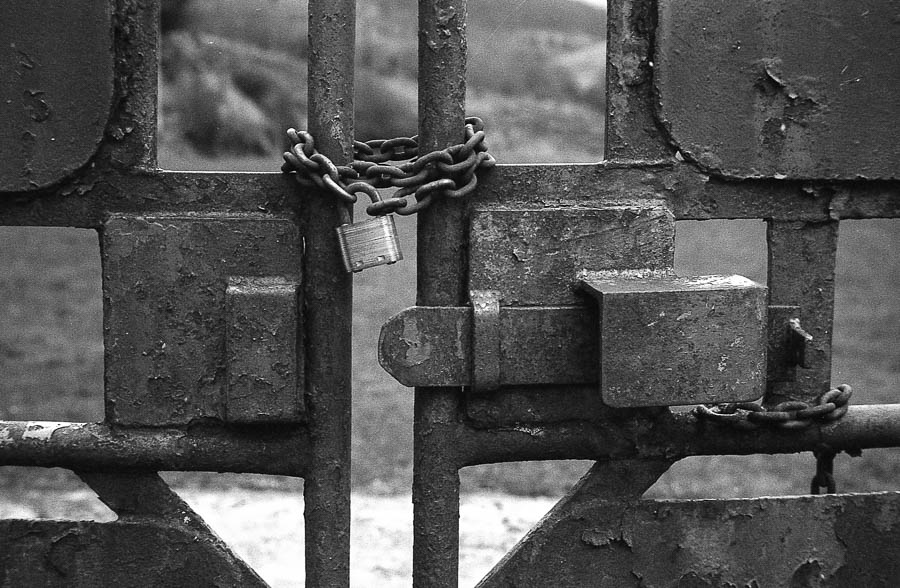
I would not recommend doing this everyday as I feel I was pretty lucky this time but it was an interesting experiment (accident) and shows just how good ilford Ortho Plus is.

Anyway here is the whole roll .. click to view larger

All images on my blog are available as prints just drop me an email

I also have a film only blog over at  usingfilm.wordpress.com if you want a peek

Eventually trying my 1st roll of Silberra Ultima 200 …….

It must be a year or two back that I supported a Indiegogo campaign for Silberra where I received 2 rolls of film … Pan 200 & Ultima 200.

You can see my Pan 200 results here .. Silberra Pan 200 …

So here is the 2nd roll Ultima 200 … I shot it using my Nikon F100 and processed it using Rodinal at 1+25 dilution for 8 minutes.

The film was a a bugger to load onto the reel in the darkroom and was also a pain to scan due to how very thin it was .. that said once scanned I was pretty happy with how it looked.

The contrast and sharpness was nice, not bad tonal range either and to my eye the grain didn’t seen as pronounced as the Pan 200 I had shot before.

I doubt I will be shooting any more as it doesn’t really bring anything new to what I shoot that HP5 or plenty of other stocks that I regularly use, also I won’t miss the loading/scanning problems.

So here are a selection of images ….

All images on my blog are available as prints just drop me an email

I also have a film only blog over at  usingfilm.wordpress.com if you want a peek 🙂

Minolta X700 & Some JCH Streetpan 400….

Over the last few months I have been adding to my Minolta SLR collection and one of the cameras I have been looking for since I began was an X700 that was in good condition as well as a reasonable price and I eventually found one.

It appeared in excellent condition so I loaded it with some JCH Streetpan 400 and popped out to give it a test.

I shot the whole roll using aperture priority using the Minolta MD 50mm f1.7 and developed in Rodinal 1+25 dilution for 10 1/2 minutes.

As you would expect the images were lovely and contrasty/sharp and the camera exposures were pretty much spot on.

The camera was lovely to shoot with handling great and is probably going to be one of the Minolta SLR’s that I will shoot regularly.

Here is a selection of images … comments most welcome

Please click a photo to view larger

All images on my blog are available as prints just drop me an email

I also have a film only blog over at  usingfilm.wordpress.com if you want a peek 🙂

First time shooting Silberra Pan 200 ….

I got a few rolls of Silberra film for supporting their Kickstarter  a while back but only now got around to actually giving them a try.

My first roll was the Pan 200 which I shot at 200 iso using my Nikon F100 and developed in Rodinal 1+25 dilution for 8 minutes.

The day was pretty overcast and actually got quite dim on a few occasions so I was a bit worried hand holding at speed as low as 1/30 sec on a few frames but to be fair they didn’t turn out too badly.

The film gave very good tonality and sharpness but with quite a pronounced grain which I didn’t mind in fact it added to the mood of these images.

Anyway here are a selection from the roll …


All images on my blog are available as prints just drop me an email

I also have a film only blog over at  usingfilm.wordpress.com if you want a peek 🙂


1st time shooting Rollei RPX 100 ….

Over the past year I have managed to pick up quite a few rolls of different film stocks that I have never shot before … Rollei RPX 100 being one of them.

Slowly but surely I am trying them and seeing what I like or don’t like with them and whether or not I would buy more.

I have a small selection of B&W developers that I use and after reading up on the web about which may be the best for this film stock and decided on Rodinal at a dilution of 1+25 which should give good sharpness and contrast from the images that I have seen especially as I pushed it to iso 200.

The day was pretty rubbish with grey clouds and sleet so I used the Leica M2 with the 7 Artisans 50mm f1.1 with the hope of trying to shoot a few images wide open.

RolleiRPX100_002

RolleiRPX100_005

RolleiRPX100_006

RolleiRPX100_007

RolleiRPX100_008

RolleiRPX100_011

RolleiRPX100_012

RolleiRPX100_013

RolleiRPX100_014

RolleiRPX100_020

RolleiRPX100_022

RolleiRPX100_023

RolleiRPX100_024

RolleiRPX100_028

RolleiRPX100_029

RolleiRPX100_030

RolleiRPX100_031

RolleiRPX100_033

RolleiRPX100_034

RolleiRPX100_035

I was very impressed with how the film performed giving tons of detail with excellent tonality and I will definitely be buying more of this stock that’s for sure.

I need to try the RPX 400 just to see if the extra grain you may get with a faster film will lessen how sharp the images may appear especially if pushed a bit.

Anyway thanks for looking ….

Click on an image to view larger

All images on my blog are available as prints just drop me an email

I also have a film only blog over at  usingfilm.wordpress.com if you want a peek 🙂


1st time shooting Bergger Pancro 400 …

Bergger_Pancro400_018A few weeks ago while buying my usual selection of film stock I also bought a couple of rolls of the new Bergger Pancro 400 to try and see how it compares against my favorite ilford HP5+.Bergger_Pancro400_012
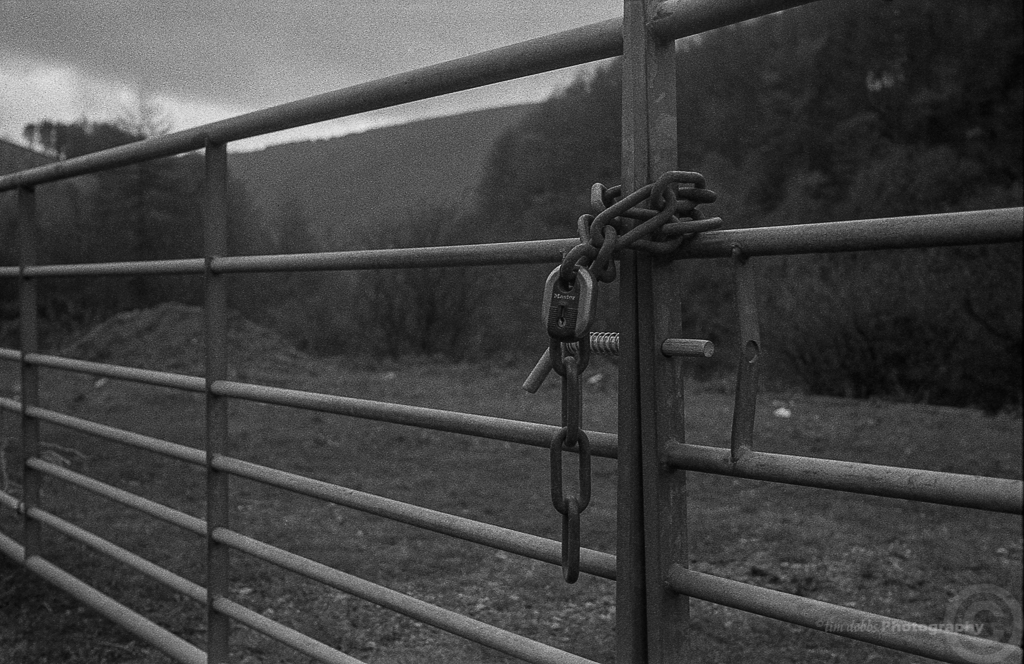
I loaded up my Leica M2 and went out for a quick walk hoping to miss the rain that had been forecast.

I rated the film at box speed and processed it in Rodinal 1+25 dilution for 8 minutes.

Bergger_Pancro400_030When it emerged from the tank I was happy with the overall look, pretty good exposure and contrast.

The 1st scans confirmed my initial thoughts and the film scanned very well.

I always try to scan as flat as possible and then increase the contrast in Lightroom.

The level of detail was very good as was the grain and what was really impressive was how much detail I got in the shadows while also retaining the highlights.Bergger_Pancro400_020

Bergger_Pancro400_014
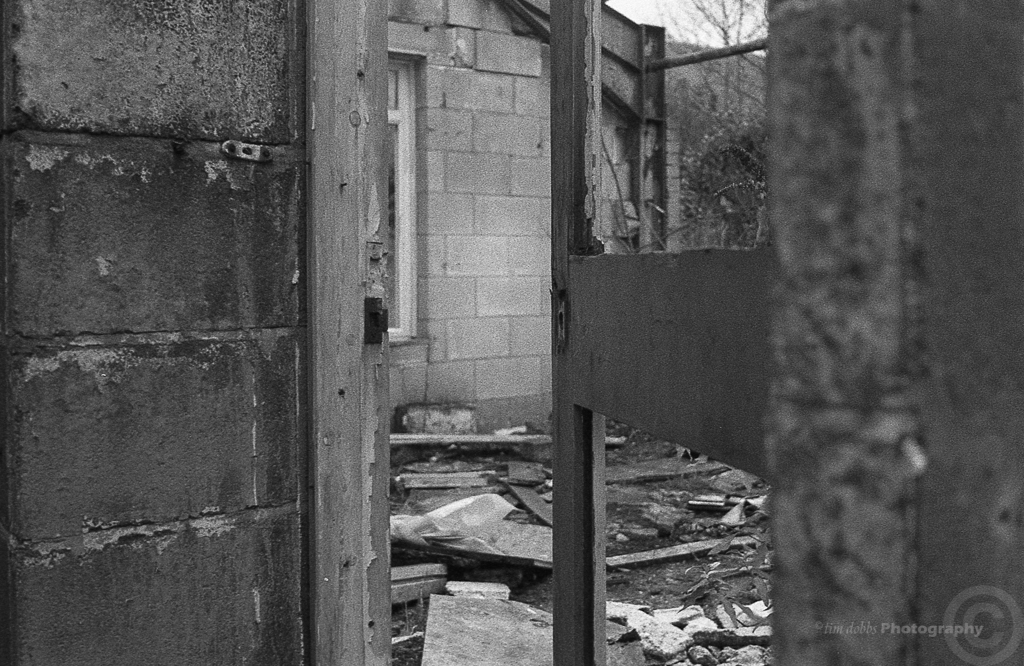
Overall I was very happy with how this film performed at box speed but I think I would like to push the next roll which is something that I nearly always do with HP5+ with brilliant results.

Anyway thanks for looking ….

Click on an image to view larger

All images on my blog are available as prints just drop me an email

I also have a film only blog over at  usingfilm.wordpress.com if you want a peek 🙂